

Creating an EC2 Instance and Installing Jenkins

Rajat Chauhan is a skilled Devops Engineer, having experience in automating, configuring, deploying releasing and monitoring the applications on cloud environment.
• Good experience in areas of DevOps, CI/CD Pipeline, Build and Release management, Hashicorp Terraform, Containerization, AWS, and Linux/Unix Administration. • As a DevOps Engineer, my objective is to strengthen the company’s applications and system features, configure servers and maintain networks to reinforce the company’s technical performance. • Ensure that environment is performing at its optimum level, manage system backups and provide infrastructure support. • Experience working on various DevOps technologies/ tools like GIT, GitHub Actions, Gitlab, Terraform, Ansible, Docker, Kubernetes, Helm, Jenkins, Prometheus and Grafana, and AWS EKS, DevOps, Jenkins. • Positive attitude, strong work ethic, and ability to work in a highly collaborative team environment. • Self-starter, Fast learner, and a Team player with strong interpersonal skills • Developed shell scripts (Bash) for automating day-to-day maintenance tasks on top of that have good python scripting skills. • Proficient in communication and project management with good experience in resolving issues.
In today's fast-paced world of software development and continuous integration, having a robust infrastructure is crucial. One way to streamline this process is by utilizing Amazon Web Services' Elastic Compute Cloud (EC2) instances and installing Jenkins, an automation server, to facilitate continuous integration and deployment. Let's dive into a simplified step-by-step guide on creating an EC2 instance and setting up Jenkins.
Setting up an EC2 Instance:
Step 1: Sign in to AWS Console
Log in to your AWS Management Console and navigate to the EC2 Dashboard.
Step 2: Launch an Instance
Click on the "Launch Instance" button, which will initiate the instance creation process.
Step 3: Choose an Amazon Machine Image (AMI)
Select an AMI based on your requirements. For example, you might choose an Amazon Linux AMI or an Ubuntu Server AMI.
Step 4: Choose Instance Type
Select the instance type based on your computational needs. T2.micro is a good starting point for testing purposes.
Step 5: Configure Instance Details
Set configurations like network, subnet, and additional details. The default settings often work fine for basic setups.
Step 6: Add Storage (if needed)
Allocate storage based on your application's requirements.
Step 7: Configure Security Group
Create a new security group or use an existing one. Ensure ports required by Jenkins (e.g., 8080 for web UI access) are open.
Step 8: Review and Launch
Review your instance configuration and launch the instance. You'll be prompted to create or select an existing key pair for secure access.
Step 9: Connect to your EC2 Instance
Use SSH to connect to your instance using the key pair you created during setup.

Installing Jenkins:
Step 1: Update Packages
Run the following commands (for Ubuntu/Debian):
sudo apt update
sudo apt upgrade
Step 2: Install Java
Jenkins requires Java. Install it using:
sudo apt install default-jdk
Step 3: Add Jenkins Repository Key and Install Jenkins
wget -q -O - https://pkg.jenkins.io/debian/jenkins.io.key | sudo apt-key add -
sudo sh -c 'echo deb http://pkg.jenkins.io/debian-stable binary/ > /etc/apt/sources.list.d/jenkins.list'
sudo apt update
sudo apt install jenkins
Step 4: Start Jenkins
sudo systemctl start jenkins
sudo systemctl enable jenkins
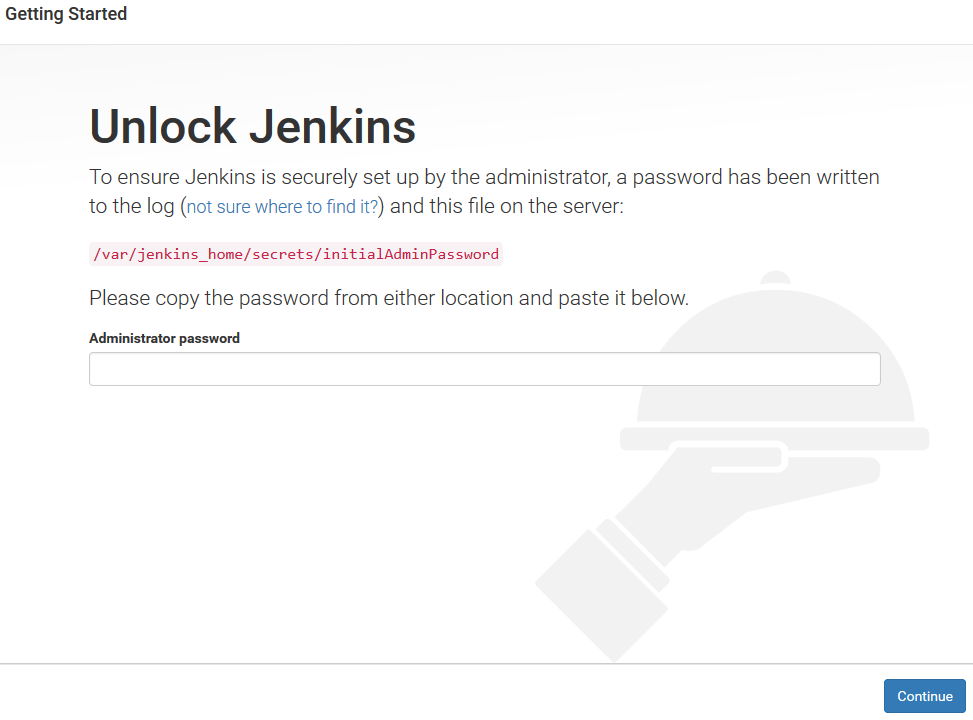
Step 5: Access Jenkins
Go to your browser and enter your EC2 instance's public IP address followed by port 8080 (default Jenkins port). Follow the on-screen instructions to complete the Jenkins setup wizard.
Congratulations! You've set up an EC2 instance and installed Jenkins. You're now ready to automate your build, test, and deployment processes efficiently.
Remember, this guide offers a basic setup. Depending on your project requirements, you might need to configure additional settings or integrate Jenkins with other tools for a more comprehensive continuous integration and deployment pipeline.


