


Amazon Elastic Compute Cloud (EC2) provides scalable computing capacity in the cloud. Connecting to an EC2 instance is an essential part of managing and utilizing its resources. This guide aims to walk you through the process of connecting to an EC2 instance in Amazon Web Services.
Step 1: Launching an EC2 Instance:
Sign in to the AWS Management Console: Log in to your AWS account and navigate to the EC2 Dashboard.
Launch Instance: Click on the "Launch Instance" button to begin the instance creation process.
Choose an Amazon Machine Image (AMI): Select an AMI based on your requirements, such as Linux, Windows, or other specialized images.
Choose Instance Type: Choose the instance type based on the computing power and resources you need.
Configure Instance: Configure additional settings like network, storage, tags, etc.
Configure Security Group: Define the security group settings to control inbound and outbound traffic to the instance.
Review and Launch: Review the instance details and launch the instance.

Step 2: Connecting to the EC2 Instance:
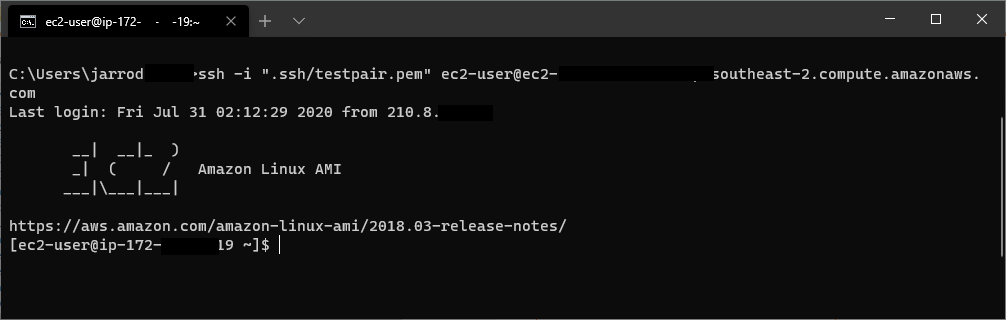
For Linux Instances (using SSH):
Get the Public IP: Once the instance is running, note down its Public IP address from the EC2 Dashboard.
Set Permissions for SSH Key: Ensure that the SSH key pair used during instance creation has the correct permissions (
chmod 400 your-key.pemfor example).Connect via SSH: Open a terminal or command prompt and use the following command to connect:
bashCopy codessh -i path/to/your-key.pem ec2-user@public-ip-addressReplace
path/to/your-key.pemwith the path to your private key file andpublic-ip-addresswith your EC2 instance's Public IP.
For Windows Instances (using RDP):
Retrieve Public IP: Similarly, note down the Public IP address of your Windows instance from the EC2 Dashboard.
Retrieve Administrator Password: Retrieve the auto-generated Administrator password using the key pair file or AWS Systems Manager.
Connect via RDP: Use a Remote Desktop client on your local machine and enter the Public IP address of the instance. When prompted, enter the Administrator username and password.

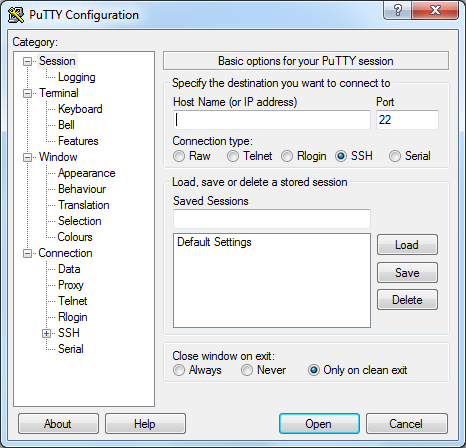
Using PuTTY (Windows):
Download and Install PuTTY: If you haven't installed PuTTY, download and install it from the official website.
Convert Key Pair for PuTTY: Convert your
.pemprivate key to PuTTY's.ppkformat using PuTTYgen (included with PuTTY).Configure PuTTY Session: Open PuTTY and enter the Public IP of your instance in the "Host Name" field. Under "Connection" -> "SSH" -> "Auth," browse and select the converted
.ppkprivate key.Connect via PuTTY: Click "Open" to start the SSH connection to your EC2 instance using PuTTY.
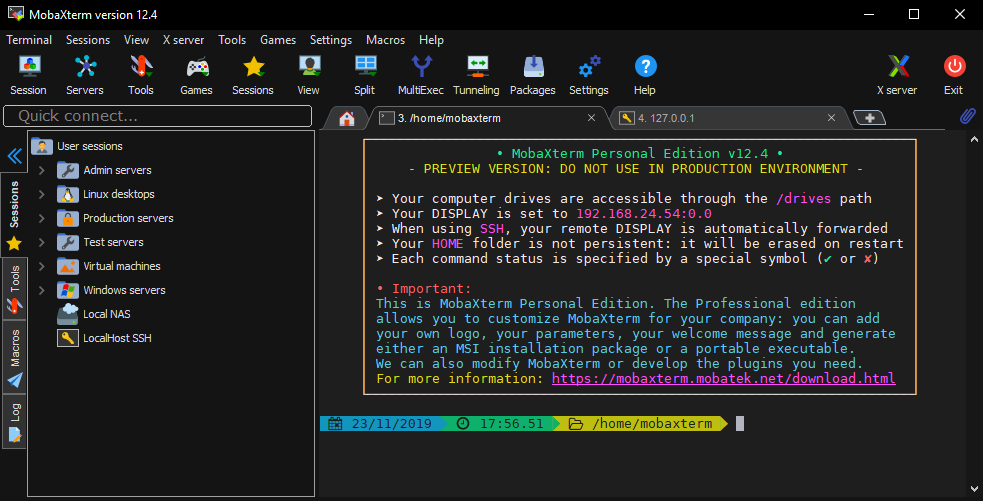
Using MobaXterm (Windows):
Download and Install MobaXterm: Download and install MobaXterm from its official website.
Load Private Key: In MobaXterm, go to "Session" -> "SSH" -> "Advanced SSH settings" -> "Use private key" and load your
.pemprivate key.Start an SSH Session: Create a new SSH session by entering the Public IP of your instance in the "Remote Host" field and the username (
ec2-userfor Amazon Linux) in the appropriate field.Connect via MobaXterm: Click "OK" to establish the SSH connection to your EC2 instance using MobaXterm.
Conclusion:
Connecting to an EC2 instance in AWS is crucial for managing and utilizing its computing power efficiently. By following these steps, you can establish secure connections using native SSH, PuTTY, or MobaXterm, catering to various user preferences and operating systems. It's essential to manage security groups and permissions effectively to ensure secure access to your instances.